| After 30 years, the old silicone rubber mirror support was retired, and a new 9 point floatation cell was made to properly support the thick 12.5" mirror in an undistorted fashion. Here are a few shots from this interesting project, taken as I worked on it this week. Took me about two nights to make the entire cell, and one day on and off to paint it because of the rain. |
|
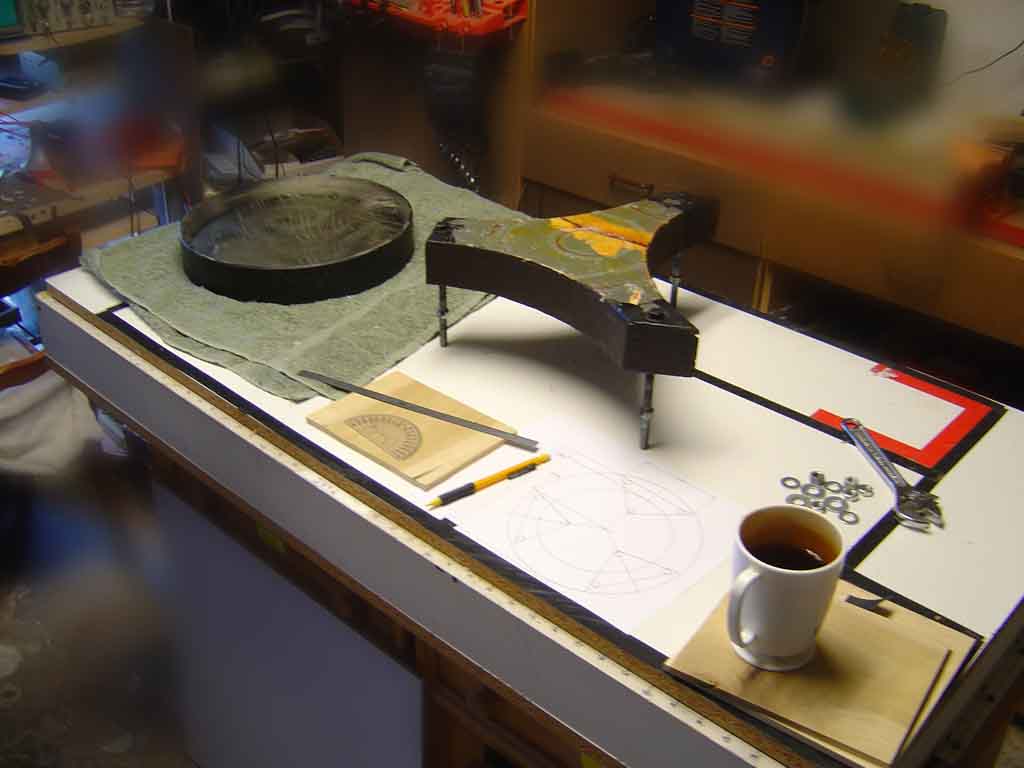
The starting point - the mirror on its face on the left, and the old solid double plywood mirror cell mount for the square tube. It is coated with gray epoxy on the top.
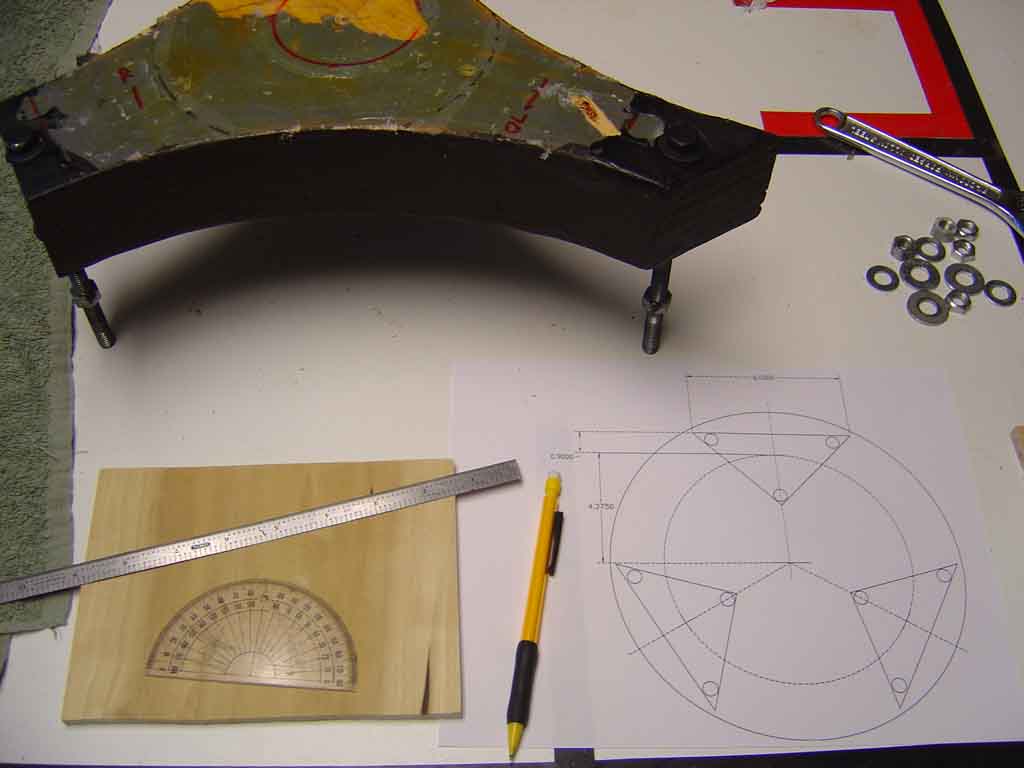
The layout was drawn up in Autocad to get the sizes of the support triangles and the placement around the 70% zone.
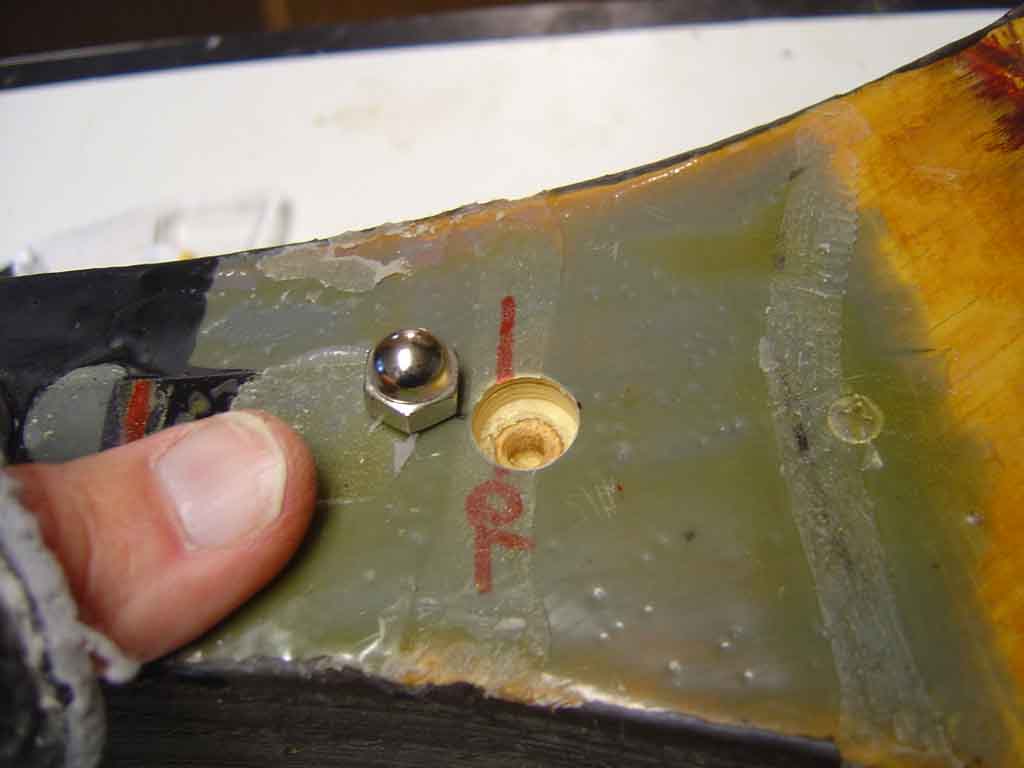
First I glued in with epoxy three stainless steel acorn nuts at the mounting point for the support triangles. They stick up out of the counter bore around 3/16".
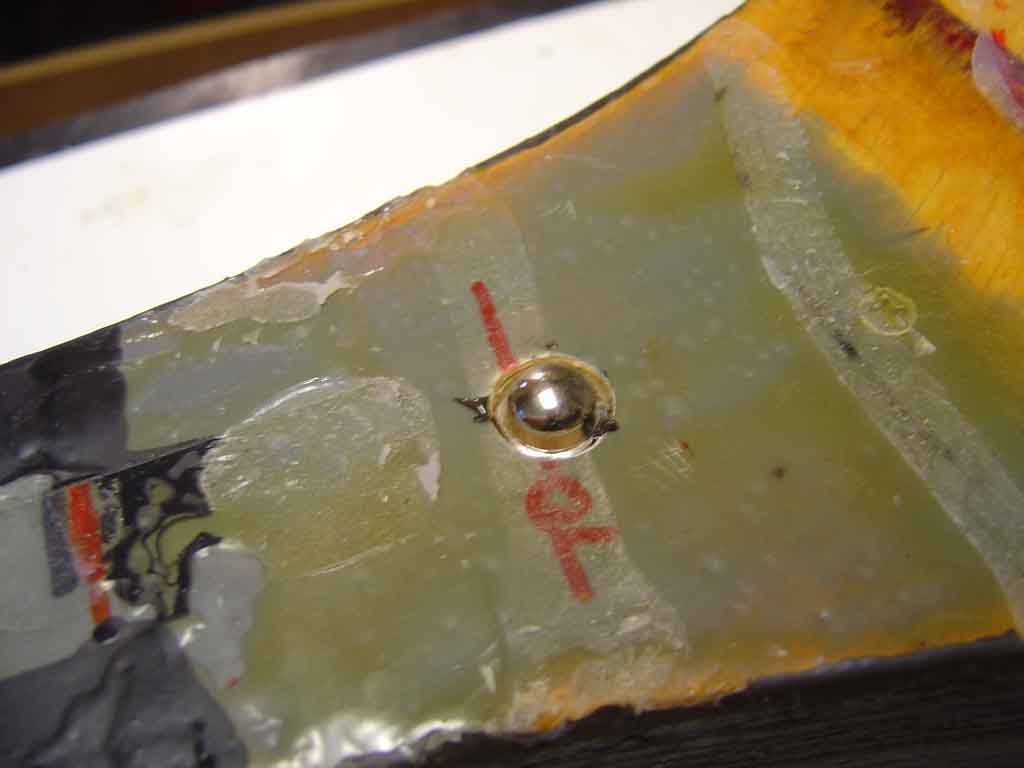
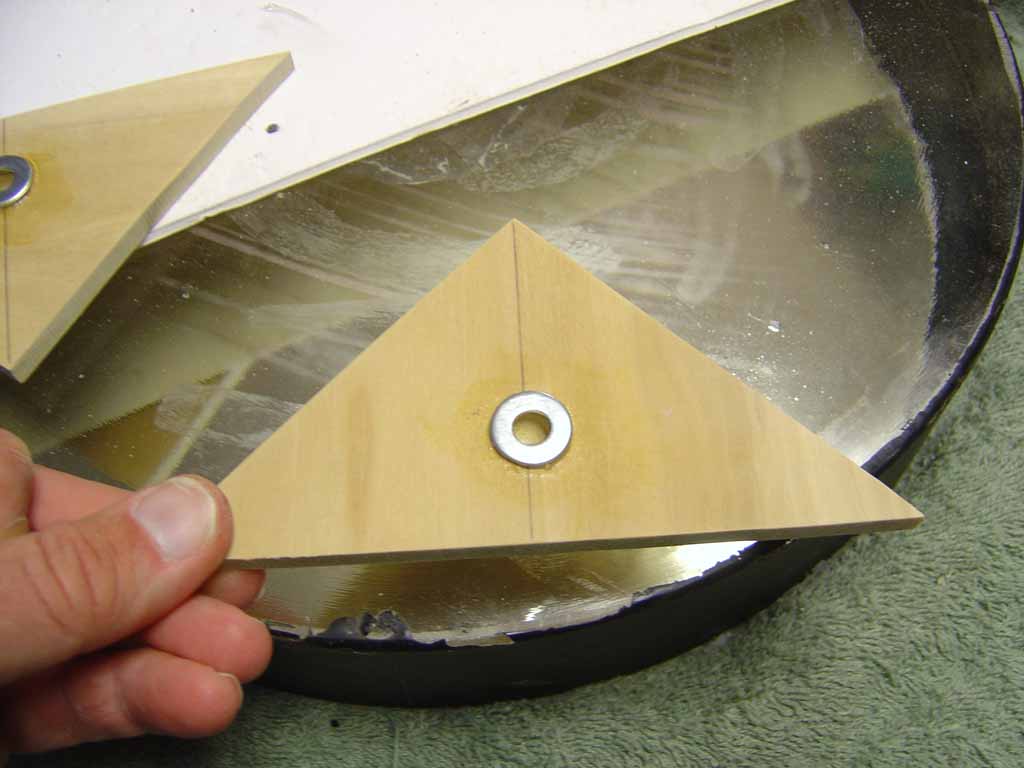
Cemented in place, the acorn nut is the tilt bearing for the triangles.
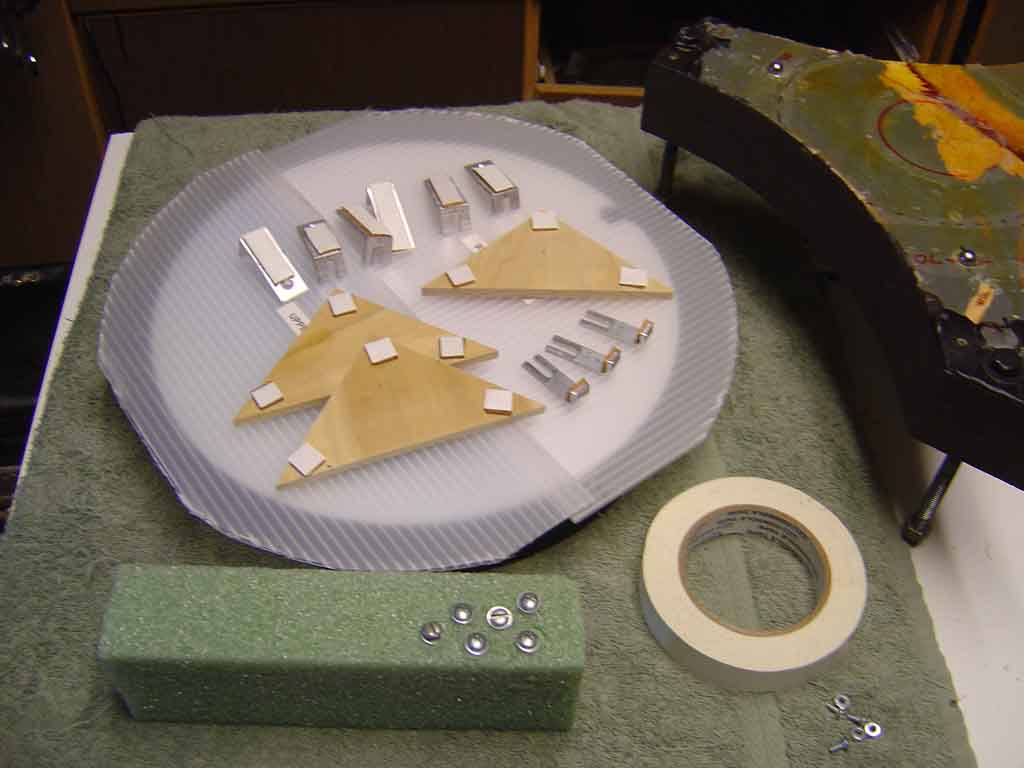
The triangles consist of three pieces about six inches long across the hypotenuse on 1/4" solid ash hardwood. Each bottom has a countersink with a steel washer to match up with the acorn nut for a tilt surface.
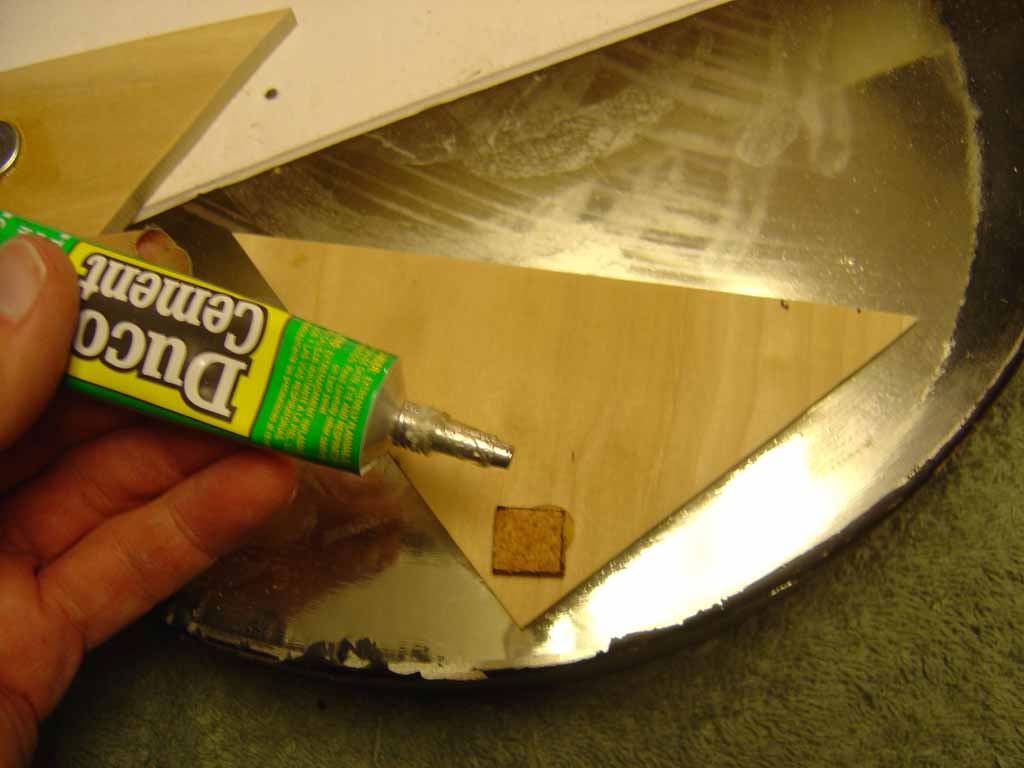
Gluing the cork pads onto the triangles.
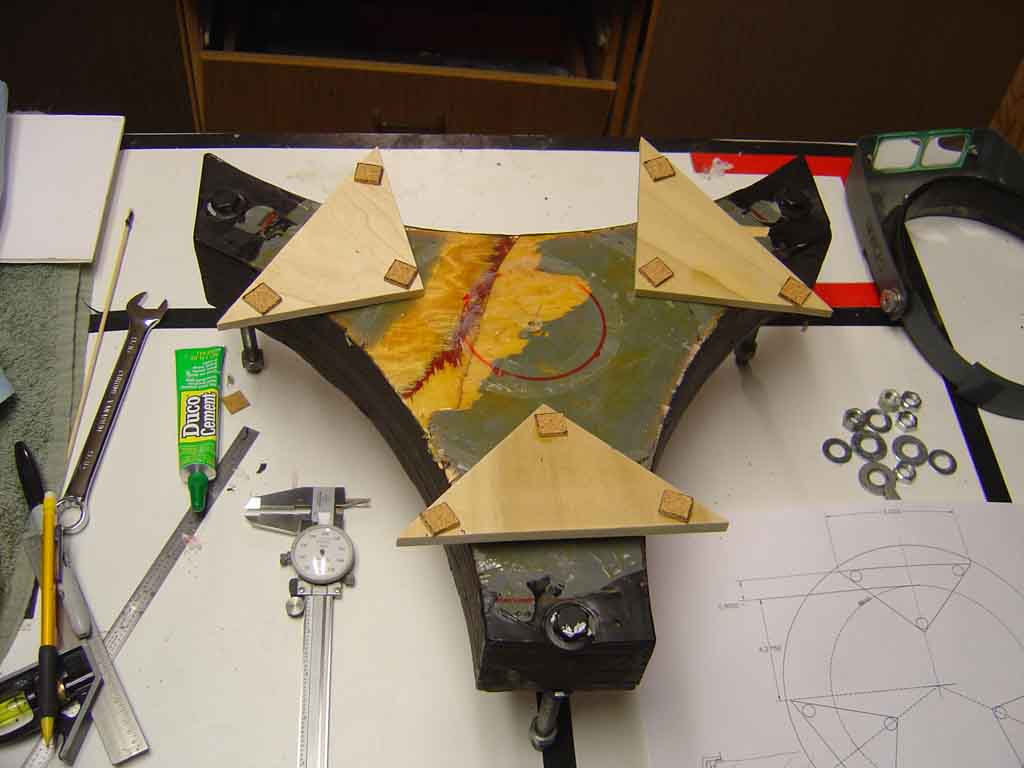
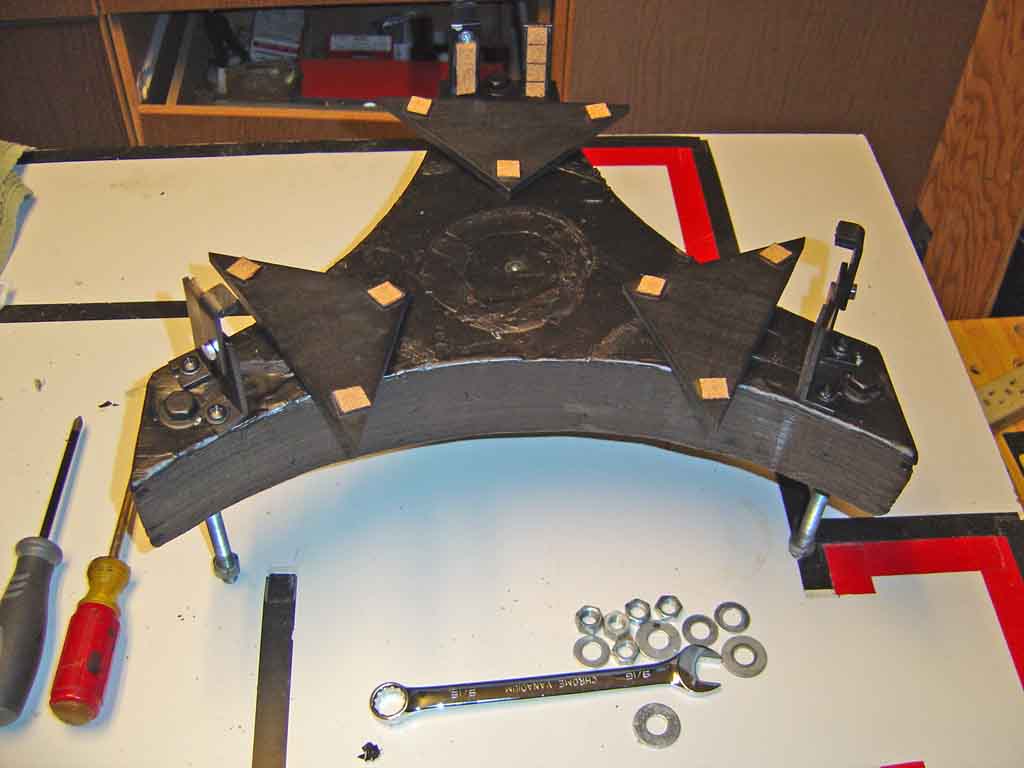
Three support triangles in place on the acorn nuts, with 9 pads for support on the back of the mirror. They each tilt a bit to conform to the back of the mirror. This is what is meant by a "Floatation Support" system.
Under the side of the mirror sitting on the cell, you can see the cork pads are supporting the mirror nicely and the are then held up about 1/8" from the mirror cell base by the acorn nut bearings.
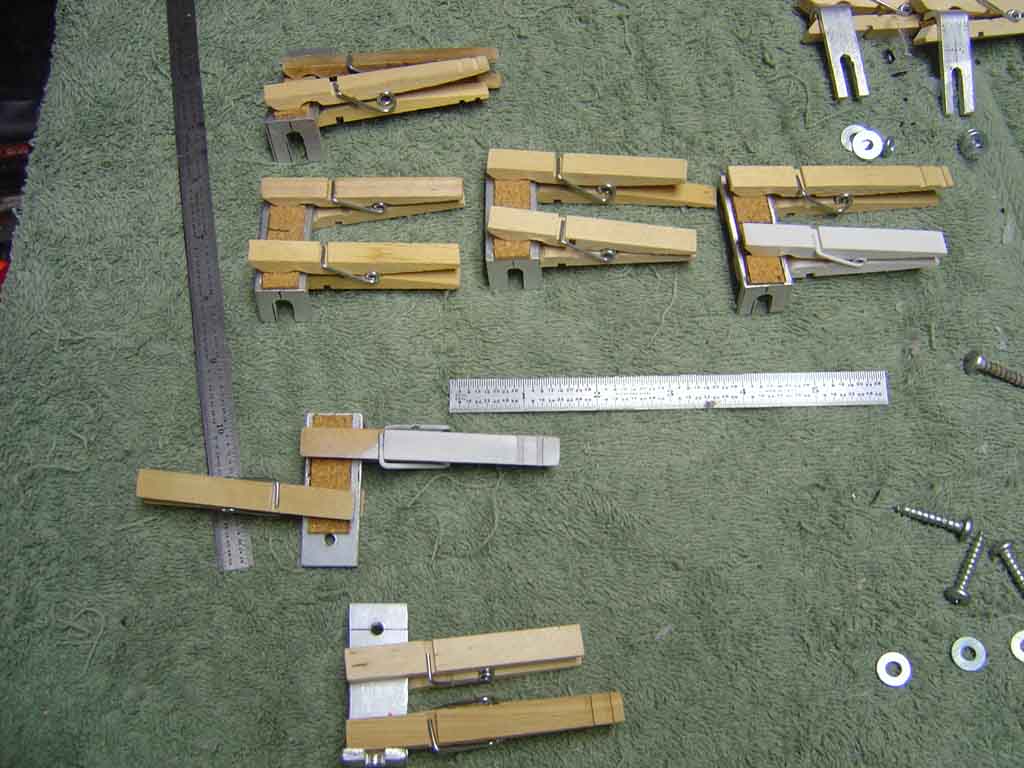
Gluing the cork pads on the side brackets and mirror clips!
Before painting, here I assembled the clips. Three sets are made, to support the sides of the mirror and hold it in place.
Getting ready to paint, the cork is masked off with tape and ready to shoot! The screw heads and washers too are masked by pushing them into Styrofoam. This keeps the threads clean.
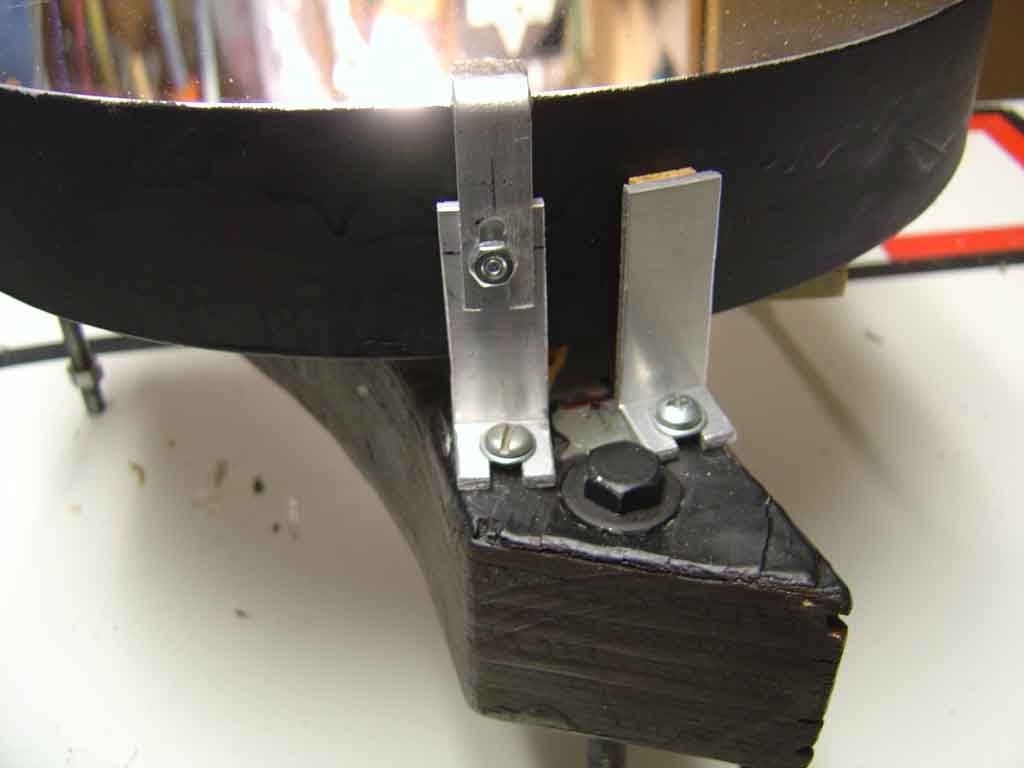
The painted components installed - the base board has been sprayed flat black as well.
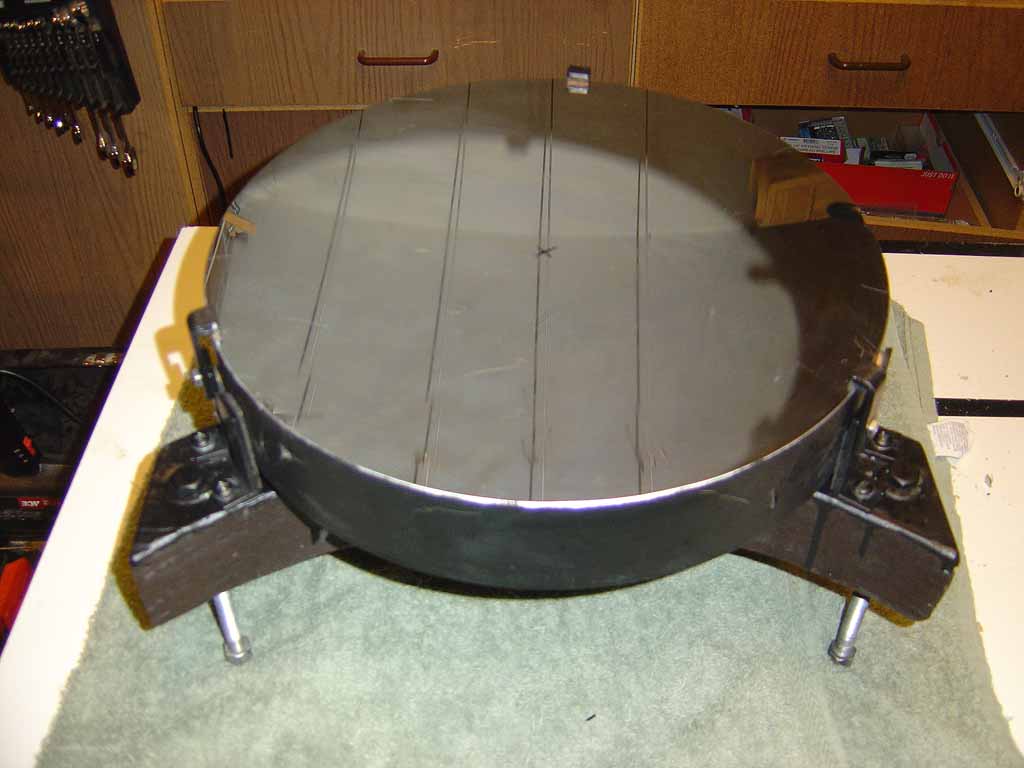
Finally, the mirror is installed and the side pieces are carefully seated as to not stress the mirror. The top clips are shimmed so they are about .015" over the surface.
Final star testing will be next, I have no doubt that the system will far outperform the old glue mount I had before! |
HOME  SCHMIDT  GALAXIES     EMISSION NEBS     REFLECTION NEBS   COMETS
   GLOBULARS     OPEN CLUST     PLANETARIES     LINKS