Spectroscope for Comet Spectra using the 10" Newtonian
3D print project using commercial hardware, grating, and Plossl Eyepiece


Uploaded 4/9/19

|
This new and exciting project had
one goal - To image the spectrum of bright comets with more detail
than can be done with a telephoto lens and objective prism. It
has been nearly 20 years since a small bright comet came by with
a small head and brilliant coma that was suitable for my small
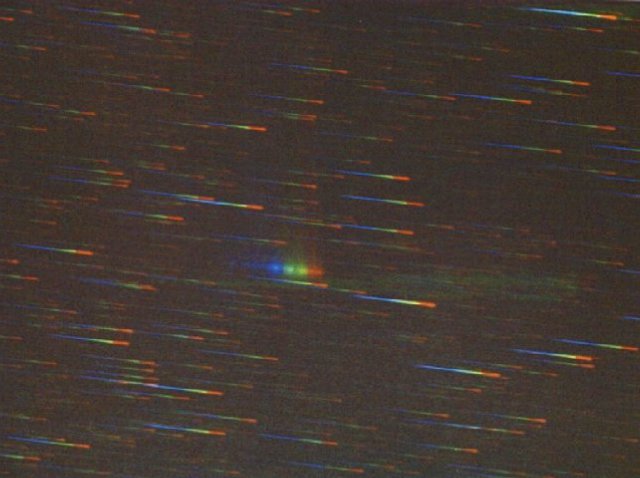
objective prisms. Here is the result I had 19 years ago with
a 400mm lens and film with such an arrangement (click to enlarge):
Comet Austin
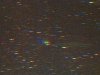
May 6, 1990, Objective Prism Spectra, 400mm f/6.3,
15mins on Ektar 1000,
Payson
While you can see a
few spectral lines as blobs, there really is not much science
you can do here.
Recently, I decided
it was time to retake this challenge, and do one step better.
The design uses a 100 lines per millimeter blazed diffraction
grating called a "Star Analyzer" and is sold commercially
to put in front of a web cam and get star spectra at low resolution.
However, as you know - without a slit, you can only get sharp
spectra of small point sources. You need to add a slit to get
spectra of large diffuse objects like comets and nebula. Using
a small achromat, you can project and collimate the image of
a slit at prime focus, or even transfer the focal plane further
back to form an image of the slit. It is in the converging beam
of the lens that we put the grating. This is not ideal, but works
well enough to get decent spectral lines in diffuse sources.
Using 3D printing technology
and CAD programs (Solid Works) I designed a new spectrograph.
I used a Meade 32mm Series 4000 Plossl ocular for the achromat
lens and made my own adjustable slit with razor blades you shave
with. A Imaging Source DMK 51 CCD camera was use to image the
resulting spectra. Here are a few more details on constructing
and using the new spectroscope. We still await that next bright
comet. But we are ready!
|
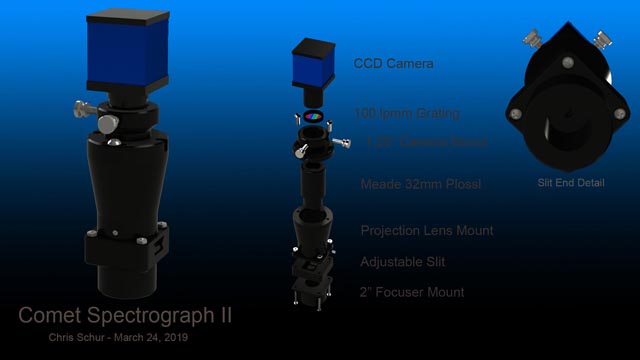 |
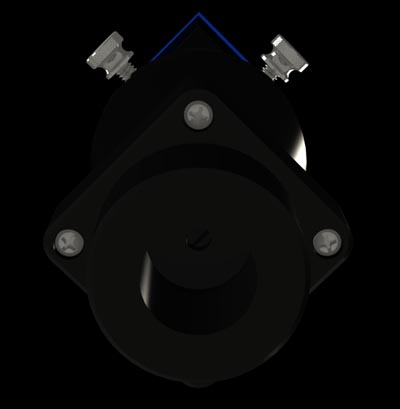
Diagrams produced
in CAD and Photoshop showing the basic construction. On the left
is the assembled unit, ready with the blue DMK camera for installation
on the telescopes focuser.
In the middle is an
exploded diagram, showing the individually printed components
of the system. By making it modular like this, it was easy to
change and optimize.
Click image to Enlarge
into awesome detail.
| 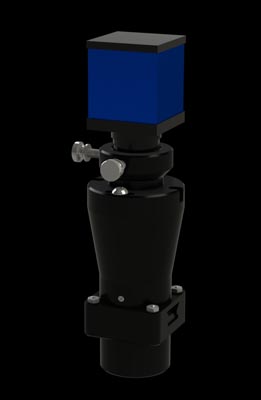 |
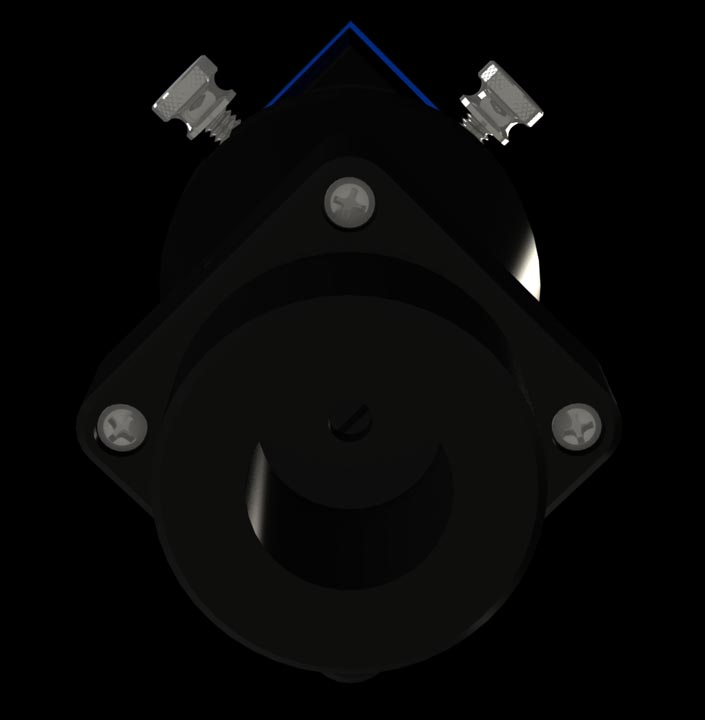
The assembled
unit. The camera has a 1.25" nosepiece and slides into the
tail piece of the spectrograph. The camera is focused indoors
on the spectra, not the slit. The camera is on a SLIDING PLATE
that allows the camera to be offset from the central axis. That
way you can put the star in the middle in the slit, and not have
to offset the image to a less sharp part of the field of the
transfer lens to see the spectra which is quite a bit off to
one side.
|
 | Nose
piece of the spectrograph shows the slit down inside. Its about
6mm tall and can open one side all the way to 3mm open to see
the field you are about to image. You then put the subject on
the stationary slit, close it down to just see the star or nebula,
then start exposing. |
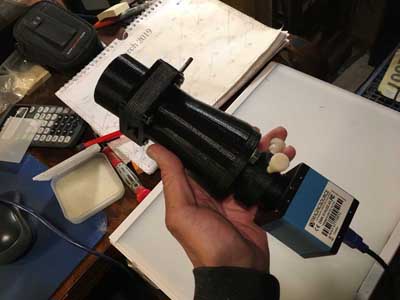 | The finished
REAL THING. Took many tens of hours to print all the parts, and
get it all to work well. Fortunately, I can test fit all the
parts in CAD so they will all connect. All parts were printed
in black PLA with a Wanhao 3D printer. |
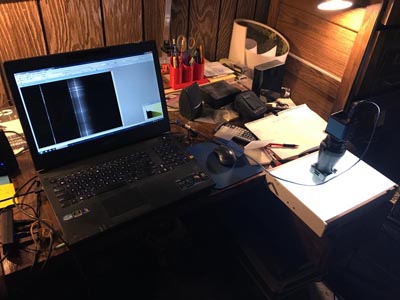 | Bench
tests. The spectrograph is sitting pointing straight down onto
a fluorescent light table which has some good spectral lines.
The PC shows the spectral image. You can see the slit on the
left and the bar like spectrum on the right. By using the offset
adjust, we move the camera sideways to put the spectra in the
center of the field approximately. |
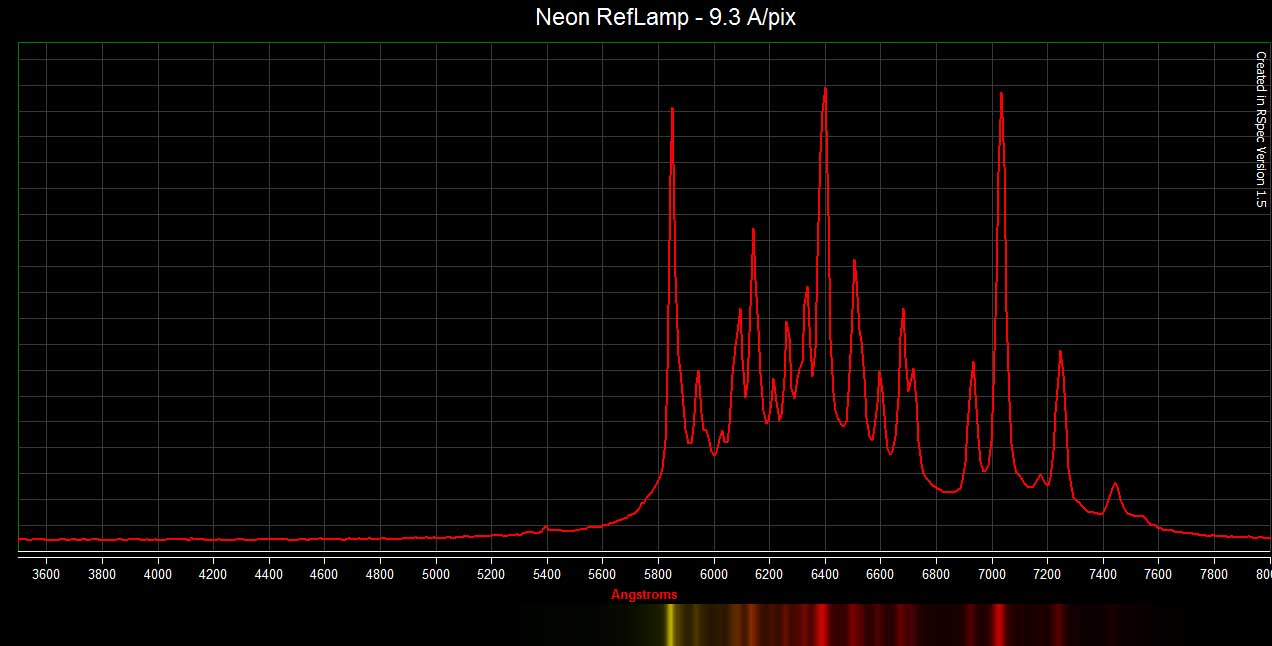
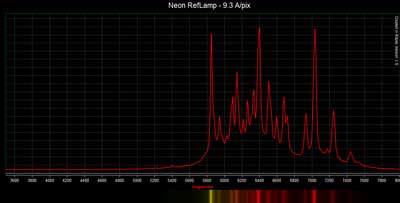 | Spectra
on the bench of Neon lamp. The spectral lines make a killer reference
to calibrate the unit precisely. It is 9.3 Angstroms per pixel
and has good dispersion for comets! This is a spectral trace
captured with RSPEC software. This software is absolutely amazing,
even the old version I use. |
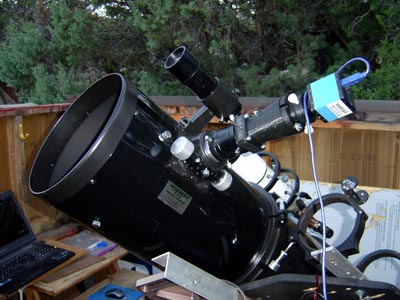
| On the
10 inch, ready for a first nights session. A star or nebula is
centered in an ocular and then this is replaced with the spectrograph
which is set parfocally. The star is usually in the open part
of the slit, and we can focus it, center it and start imaging
its spectrum. |
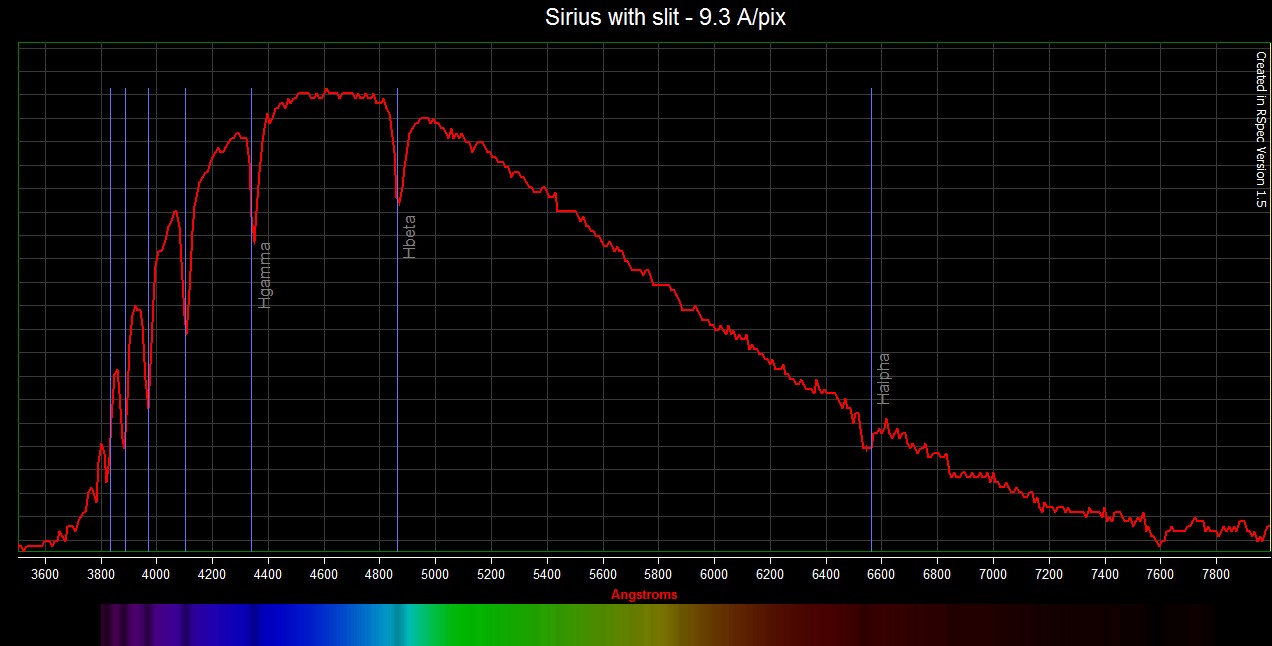
 | The star
Sirius with the new spectrograph, displayed here in RSPEC. Ive
also turned on the Balmer lines reference which align well with
the dips in the spectrum. Click to enlarge! |
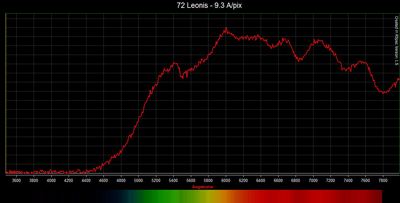 |
72 Leonis is
a M star with a lot of orange and reds. The ripples in the spectrum
on the right are due to molecules in its cooler atmosphere.
So these are the first
results with this new instrument. When the next naked eye comet
comes, Ill try it!
|
Instrument: 10 inch f/3.9 Orion Astrograph Newtonian
Grating: Star Analyzer 100 lpmm
Mount: Astrophysics 1200 QMD
CCD Camera: DMK51 Imaging Source
Location: Payson, Arizona, Elevation: 5150 ft.
Image Processing Tools: RSpec for spectral extraction, Photoshop CS2
HOME GALAXIES EMISSION NEBS REFLECTION NEBS COMETS
GLOBULARS OPEN CLUST PLANETARIES LINKS
|


