Cbot
- Plant Maintainence Robot 1
Preliminary
Development Projects
Updated
5/9/15
Key
Search Words: ROBOT, ROBOTICS, ROBOTIC VISION, ARTIFICIAL INTELLIGENCE,
AI
 Development of the water tank, pump and feed mechanism
| For
a mobile robot to water plants at various locations around the
home, it must carry and maintain a tank of water which is fills,
travels with to the plants and then dispenses. And when it is
low, it must refill as needed. Here we are going to show you
this weekends progress on this facet of CBOT, and some testing
of the water pump in action! |
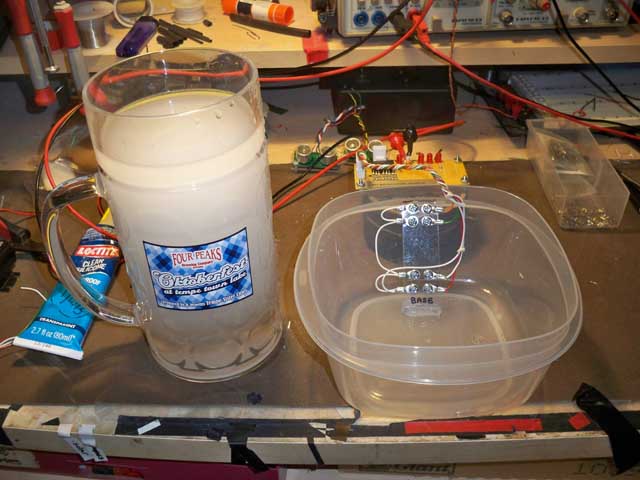 | Left: Here
is the water tank (Tupperware) on the bench to show its internal
sensor. This consists of a flat plate with electrical contacts
at various levels in the tub, which mark four different levels.
As the water touches each set of contacts, the circuitry detects
the change in resistance and indicates the water depth with a
LED lamp, and sends a TTL level to the micro controller so it
knows where the water level is at all times. Now it doesn't have
to know EVERY water level there is, just when we are at four
key positions. A huge cup of water is waiting on the left to
be dumped in. The tub is 8 inches across and 4 inches deep. |
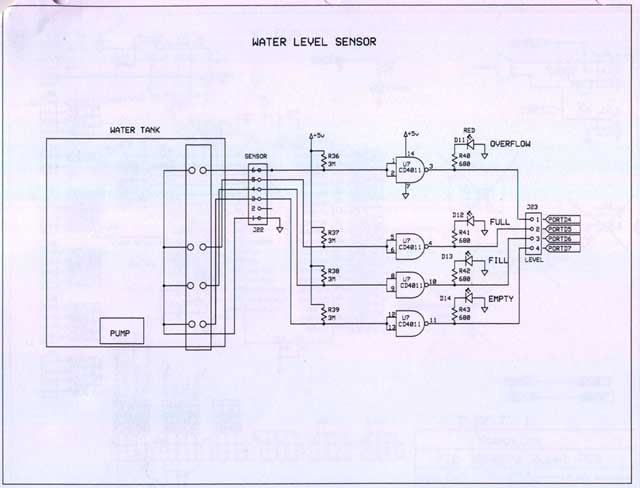 |
Left: Schematic
of the water sensor. CMOS logic gates are used to detect the
change in conductivity and put out a 0 - 5v level for each step.
Below:
Water at several
steps as I fill the tub, showing the LED lamps lighting as the
water level gets higher. There are four levels indicated - Too
Low where the pump water intake occurs, Fill is the low point
normally, Full is the maximum when full, and Over full is way
too high and will make a mess.
|
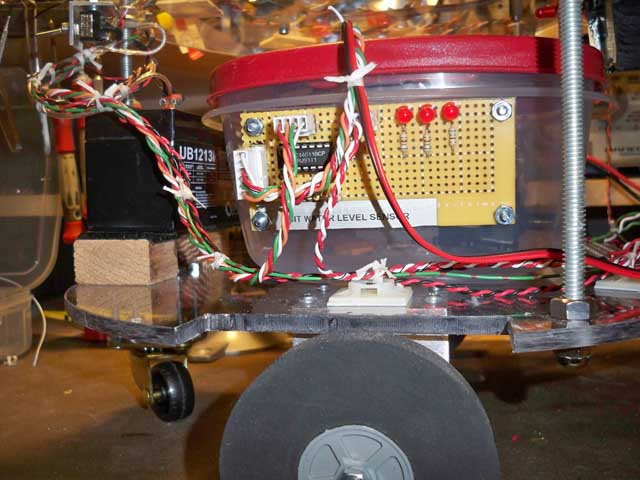 | Left: Now
mounted on the side of the tub, the circuit board is ready for
action. Wires send the signals to the micro controller on the
top deck. |
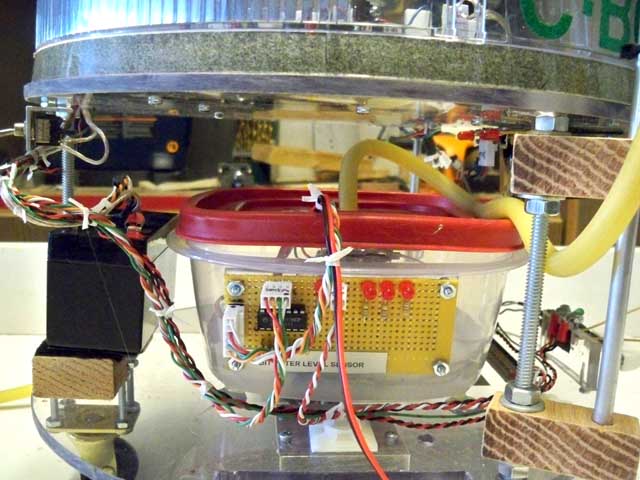 | Left: The
latest view shows the water tubing coming out of the pump, through
the lid and on to the post mount on the right side. A quarter
inch mast will run the tube up to the top. |
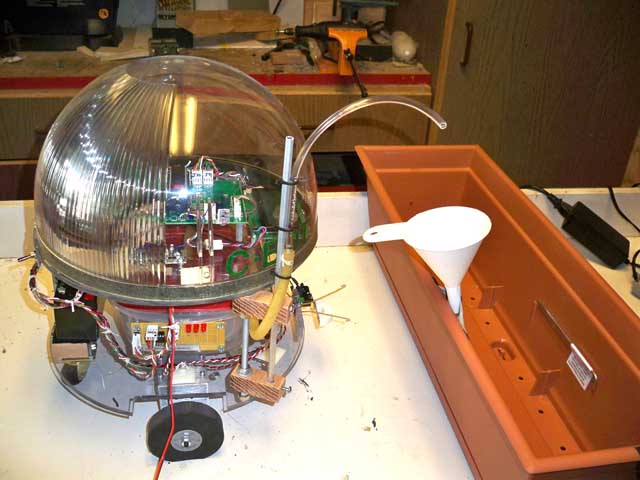 |
Left: Well, this
is the basic concept on how I plan to have the robot water the
plants. There will be 2 - 4 planting trays exactly like the one
here, with funnels mounted in two or three places on each. The
robot stops at each funnel and turns on the pump. The funnels
connect to a tubing distribution system for each plant that carries
the water right to the base of the plant. This way the robot
does not have to be dangerously close to the delicate plant.
Now the cool part - each funnel will contain watering instructions
as to how long to run the pump so each plant gets the exact amount
of moisture daily. I will determine this for the week and place
a color chip at the funnel. A small camera with a color sensor
will read each color at the funnels and send the amount of water
I have indicated. So like red is pump for say 1 second, and blue
for three, etc. (wait till you see the color sensor, its totally
cool!)
The end of the
tube will be attached to a curved piece, which I dont have here
yet!
|
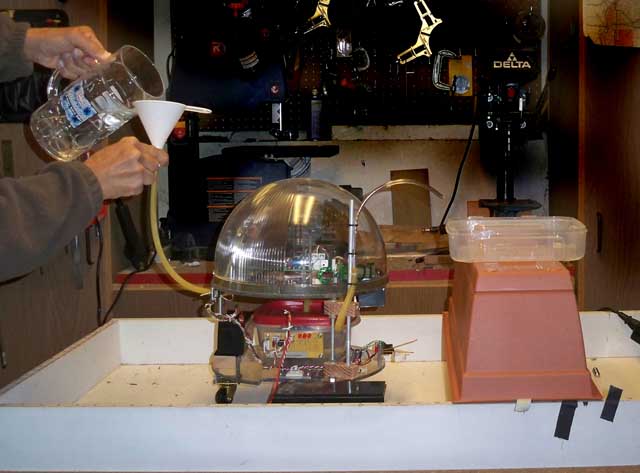 | Left: Setup
to see how much water will squirt out when I fire up the pump!
Here Im manually filling the tank. The plan will be the docking
station will do this automatically each time the robot docks
for the night. |
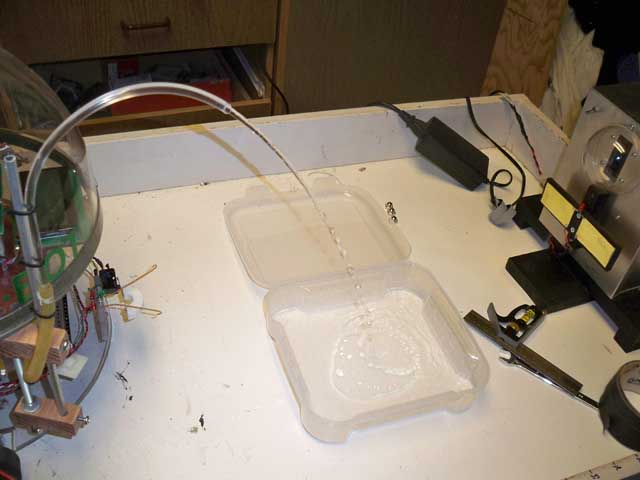 |
Left: And - Blastoff!
with 12 volts on the pump motor in the tub, we get a very nice
stream.
The next steps
are to now automatically fill the water tank. The robot will
actually do this by monitoring its water levels and running the
fill pump on the dock by itself. Now that will be a trick...
|
BACK TO ROBOT PAGES
 HOME
HOME


