|
Introduction
This is a step
by step procedure of an extremely powerful image processing method
to remove the dark wavelets "shadows" that are created
around the bright solar rim and prominences when using the wavelets
processing program of your choice. This is a normal artifact
that is created by many deconvolution routines when a bright
saturated region is next to another part of the image of normal
brightness. When processing solar images, we typically over expose
the solar disk to bring up the very faint prominences for later
superimposition with a properly exposed disk shot to form a complete
composite. Here I will show this artifact, and how to easily
use Adobe Photoshop layers to remove it completely with no loss
in sharpness or details.
The problem.
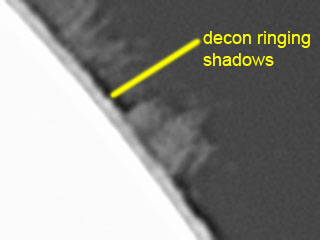 |
Especially
at times when the seeing was poor, we often need to apply the
wavelets filter to our stacked solar images to bring up its sharpness
to acceptable levels. But usually, as you increase the strength
of the filter, and the details really start to emerge, the ugly
wavelets shadows start to appear. By the time the proms are getting
superbly detailed, the shadows ruin the image completely. And
there is no easy way to remove them afterwards. On the panel
on the left, I am showing you what these shadows look like on
a prominence shot. The brilliant rim of the sun creates the dark
shadow that extends over into the prom area, and puts in an unacceptable
dark band all the way around the limb. The good news, is that
there is an easy method to rid your prom shots of this evil artifact,
and in fact, there is no longer any excuse for having them in
your fine solar images. |
A typical
wavelets sequence on a prime focus solar prominence image.
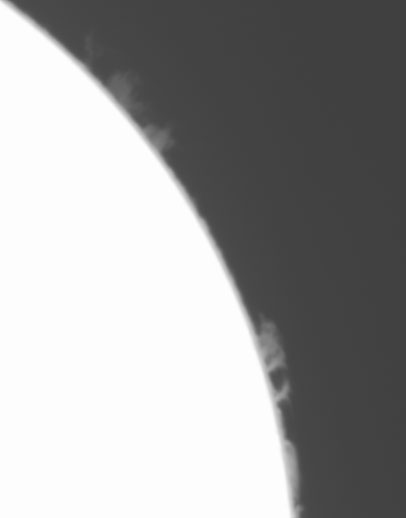 |
This
image is a crop from a full frame with an Imaging Source DMK
camera of the solar limb in Halpha Light. This is the result
of a raw stack of about 300 of the sharpest images out of 1200
selected automatically in Registax 6. No wavelets have been applied
yet. Although the disk is necessarily overexposed, the proms
and spicules are not. |
Here are three
processed images with wavelets. The radius of the sharpening
is always 1 pixel, but the amount varies by a factor of three:
Although the first
image is sharper, more detail is waiting. The second image is
getting there, but NOW you can start to see the shadowing. And
by the third image, its all over with, the wavelets have created
a nice sharp prominence, but the shadowing is unacceptable.
This is the set
you start with, three or more images, sharpened by different
amounts evenly into Photoshop. We paste the first two images
onto the third so form a three layers stack. Here is the layers
pallet with the stack:
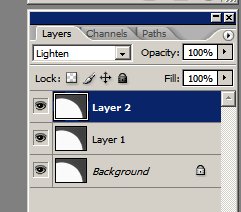 |
This
is just the three images above. It doesn't matter what order
they are in, as long as they are all from the same starting image.
No registration is then required. Change the combine method in
the drop down box above for the layers over the background to
"LIGHTEN". Then flatten. This will combine all wavelets
layers into one image, with the dark shadows from the more strongly
filtered images filled in by the less filtered images in the
same areas. But because of the fact that the more sharp an image
is, the brighter it is, ALL THE DETAIL will be retained in the
final stack. The image below is the final result of this stack. |
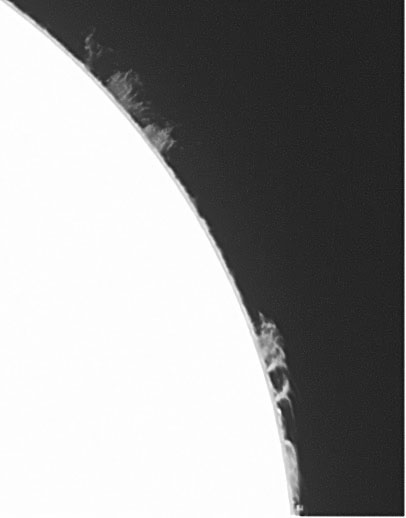 |
We
can now apply any noise filtering, colorizations or levels adjusting
to suit. I left these images very light so you can see the dark
shadows easier! Below is the final prominence limb image, combining
six sub frames (18 wavelets images) for creating this background
for our disk shot. |
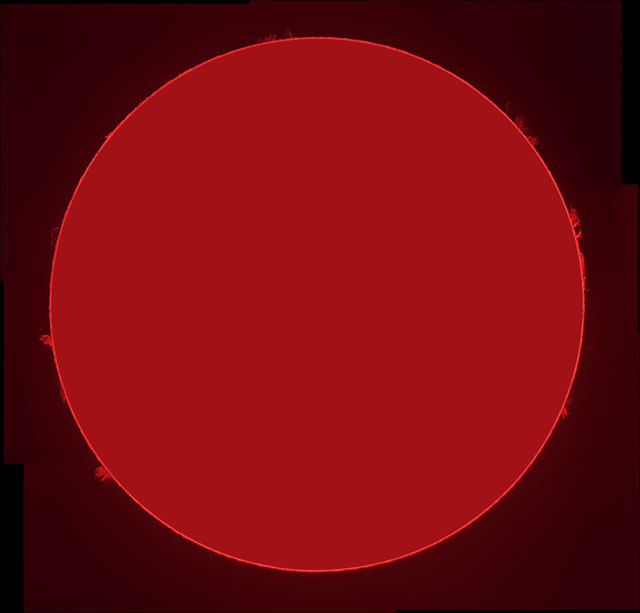 Here is the entire limb
of the sun processed in the manner described. Sharp and crisp,
when the seeing was very poor. And no dark limb artifacts. Here is the entire limb
of the sun processed in the manner described. Sharp and crisp,
when the seeing was very poor. And no dark limb artifacts. |
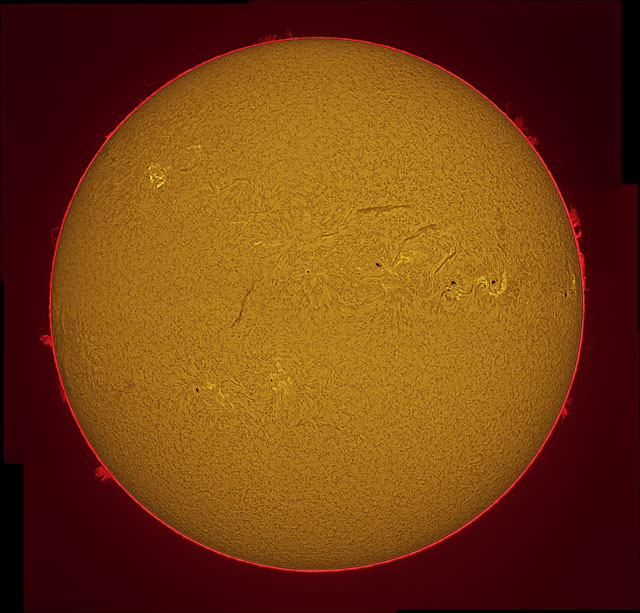 After the disk is added,
the shot is complete! After the disk is added,
the shot is complete!
|
Conclusions
From what I have
seen, this shadowing artifact appears quite regularly in amateur
moon, planet and solar images. You've seen moon craters that
have been over deconvoleved with big dark rings around them,
or Saturn's rings with artifact that looks exactly like the Encke
gap, but isn't quite in the right spot. Now you can deal with
this ugly artifact, and your solar prom shots will sparkle with
a brilliance and sharpness like never before.
|


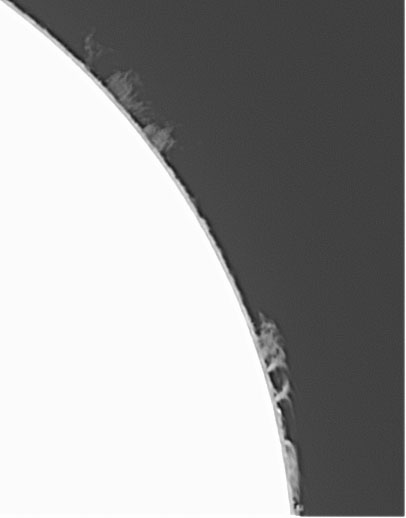


 Here is the entire limb
of the sun processed in the manner described. Sharp and crisp,
when the seeing was very poor. And no dark limb artifacts.
 After the disk is added,
the shot is complete!