
In this section we will discuss one of the most important and often overlooked aspects of successfully docking your robot to the charging station: The Electrical Contacts. Sure enough, you now have the knowledge and programming skill to get that robot to recognize, drive to and make physical contact with the battery charger. But none of this is any good if you can't make a low resistance electrical circuit with the charging plates. Here, we will go over several different styles of charging contacts, and the methods we connect to them.
Hoops, Rings and Curved Contacts
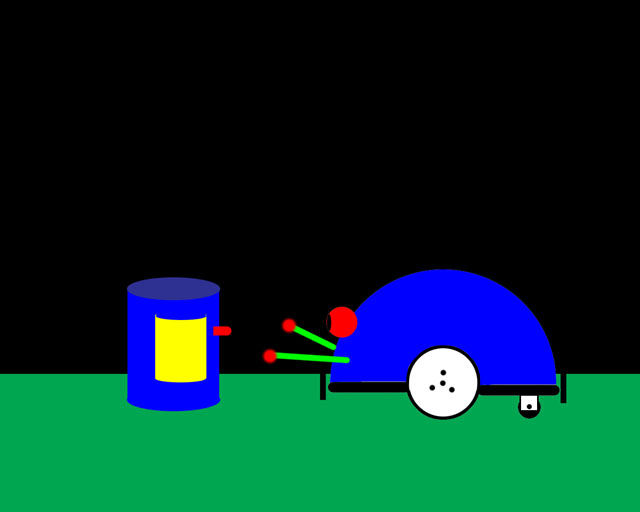
Docking Cylinder
This relatively straightforward connection technique uses a cylinder as a docking base, with the contacts on each side. Between the contacts, the beacon guides the robot in, and the whiskers on the robot touch the sides of the cylinder, and make electrical contact. You can make the cylinder out of any nonconductive material, as long as it is weighted to not move easily. The contacts can be brass, copper or aluminum foil tape strips, and will fit the curve of the cylinder.
On the robot, the "feelers" that will nest on both sides of the can are made from large diameter guitar strings, the brass kind that wrap around a music wire core. They can be easily soldered to and make very resilient touch sensors as well.
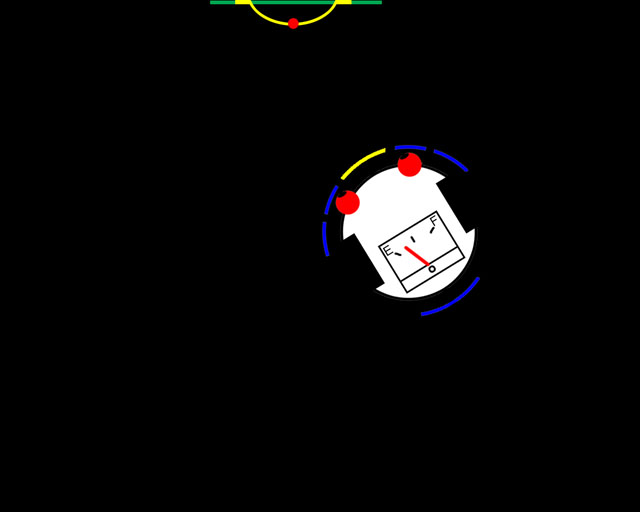
"D" shaped curved straps
Another favorite of ours is using a pair of flexible brass straps, that are spaced at about an inch apart mounted to a flat vertical surface. When the robot connects, they bend and conform to the curved frontal contact on the robot. We tested this version first, and found it worked quite well.
On the robot, the front bumper is split into two contacts, one on top of the other spaced by an air gap. This will nest perfectly with the two curved straps on the charging base.
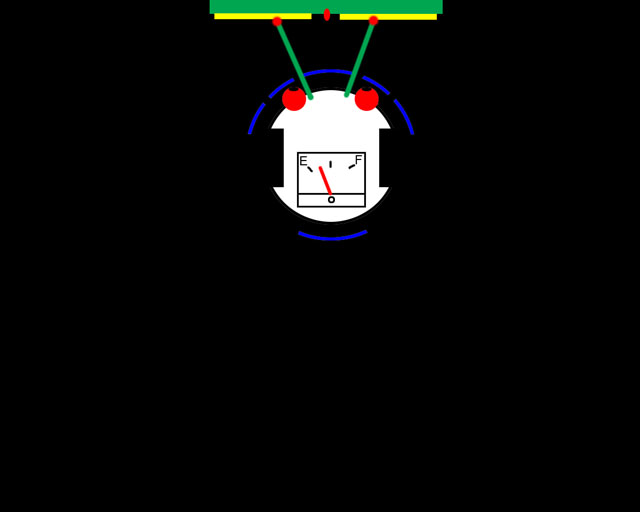
Flat Wall Plates
Another great favorite of ours, was this technique. Here, we once again use guitar strings on the robot as feelers and electrical contacts at the same time. The plate is two copper or brass flat surfaces, with a gap between for the IR beacon LED. The robot drives right into the plates and gets connected quite well, the resilient bending of the guitar strings for feelers makes a great contact brush.
We rather liked this one as well, but sometimes the robot would come in at too steep of an angle and miss the plates on one feeler.
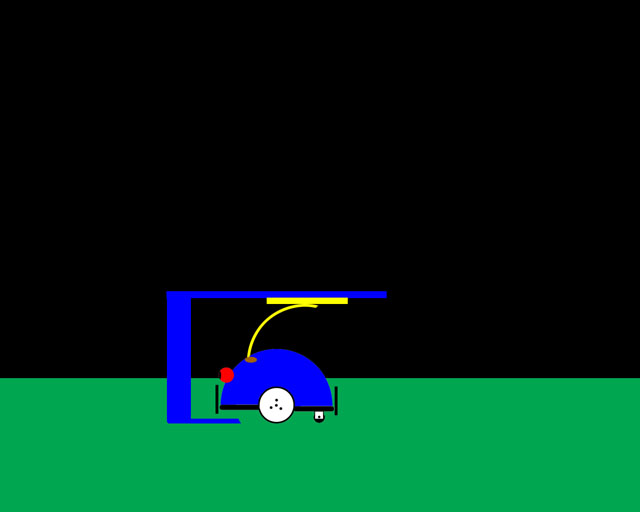
Upper Overhang Contact
This design is rather tolerant of poor alignment and can also use the guitar strings for contacts on the top of the robot. The top plate under the overhang is really two copper plates in which the robot drags its feelers over when it drives underneath. This creates a decent electrical connection, and protects the robot as well from dust and from being a trip hazard at night.
One robot we so equipped looked quite "Spacey" with the two antennas on top, and yet they were not for decoration as most are, but were essential electrical contact mechanisms.
Inductively CoupledUnderside Contacts
Inductive Coil Charging
One reader on Robots.net suggested to me this method, which he is currently working on for his own robot. The robot drives in over a puck shaped disk, which contains the lower active air gap transformer. In the bottom of the robot is the upper air gap coil, and when brought in proximity or actually slid over each other would be better, you get sufficient charging current to work with. One great advantage of this method is there is no electrical contacts and no chance of accidental shorts.
Drive over Contacts
This is the type we finally used a few years ago on PAAMI, our priority arbitration robot. The base has two tight springs sticking straight up with chrome balls on them for contactors. The bottom of the robot is two flat plates which slide over the balls to make a nice spring loaded contact. Other variations include brass buttons, brass levers hinged on one end, and yes even steel wool pad will work fine here.
Conductive Wheels
The idea here is to have the robot simply drive over some live electrical plates and use the wheels to conduct the power into the internal charger. In practice this sounds great, but is very difficult to pull off. All metal wheels do not fare well in a household or office for one, and pick up a coating of non conductive dirt in no time. Also, it is not easy to link the charger to the axles of the wheels. Some have tried conductive foam wheels, but that wont last very long. Perhaps one way is with contacts that drop down when the robot strikes the vertical surface of the charger. A lever would push and drop the brass contacts down to the surface, retracting them when the robot backs off the charger.